Red Velvet Snowballs Recipe
Introduction
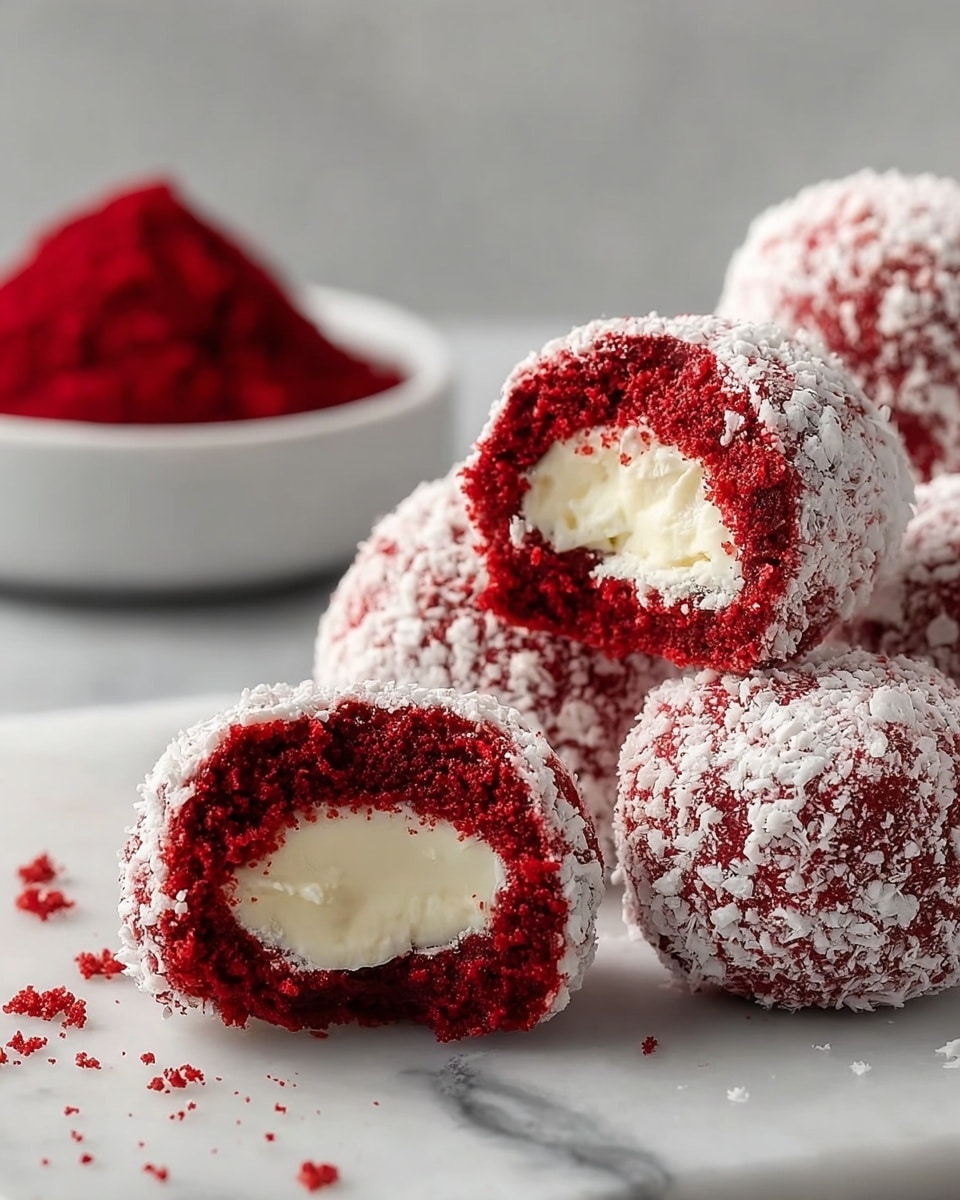
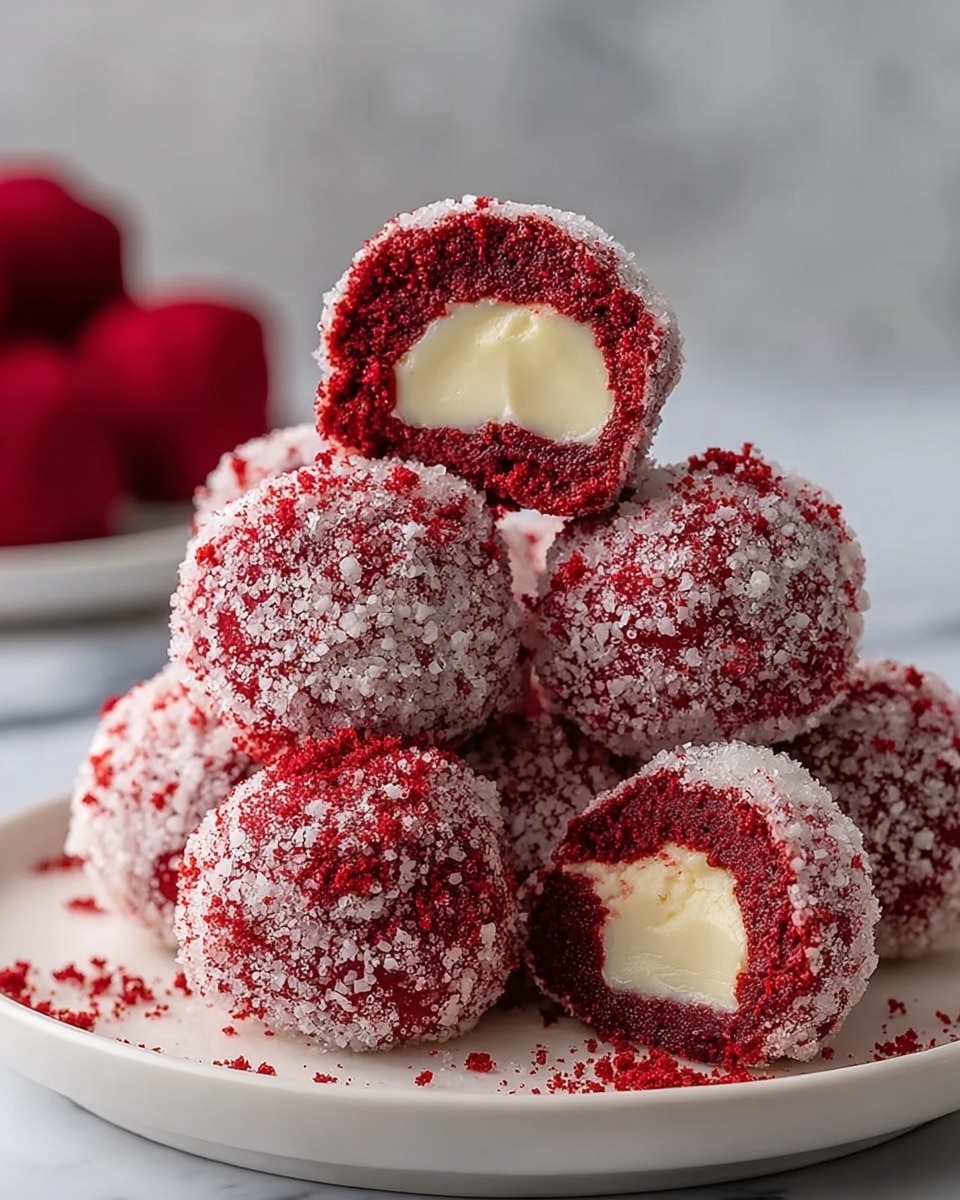
Red Velvet Snowballs are soft, cocoa-infused cookies with a festive red hue, coated in powdered sugar for a snowy finish. These tender treats are perfect for holiday gatherings or any time you crave a delightful, colorful dessert.
Ingredients
- 1 1/2 cups all-purpose flour
- 1/2 cup cocoa powder
- 1 teaspoon baking powder
- 1/4 teaspoon salt
- 1/2 cup unsalted butter, softened
- 1 cup granulated sugar
- 1 large egg
- 1 teaspoon vanilla extract
- 1 tablespoon red food coloring
- 1 cup powdered sugar (for coating)
Instructions
- Step 1: Preheat your oven to 350°F (175°C) and line a baking sheet with parchment paper.
- Step 2: In a bowl, whisk together the flour, cocoa powder, baking powder, and salt.
- Step 3: In another bowl, beat the softened butter and granulated sugar until creamy.
- Step 4: Add the egg, vanilla extract, and red food coloring to the butter mixture. Mix well until combined.
- Step 5: Gradually add the dry ingredients to the wet ingredients, stirring until fully combined.
- Step 6: Scoop tablespoon-sized portions of dough and roll them into balls.
- Step 7: Place the dough balls on the prepared baking sheet, spacing them evenly.
- Step 8: Bake for 10-12 minutes until set but still soft in the center.
- Step 9: Let the cookies cool slightly on the baking sheet for a few minutes.
- Step 10: While still warm, roll each cookie in powdered sugar to coat them completely.
Tips & Variations
- For a deeper red color, use gel food coloring instead of liquid.
- Chill the dough for 30 minutes before baking to help the cookies hold their shape better.
- Add a pinch of cinnamon or espresso powder for a subtle flavor boost.
- Use mini chocolate chips mixed into the dough for added texture and sweetness.
Storage
Store the Red Velvet Snowballs in an airtight container at room temperature for up to 4 days. For longer storage, freeze the baked cookies in a sealed container for up to 2 months. To reheat, let thaw at room temperature and optionally warm in a low oven for a few minutes.
How to Serve
Serve this delicious recipe with your favorite sides.
FAQs
Can I make these cookies without red food coloring?
Yes, you can omit the red food coloring if preferred. The cookies will have a cocoa brown color instead of the classic red velvet hue but will still taste delicious.
Why are the cookies rolled in powdered sugar while warm?
Rolling the cookies in powdered sugar while warm allows the coating to stick better, creating a thin, snowy crust that enhances both texture and appearance.
PrintRed Velvet Snowballs Recipe

Red Velvet Snowballs are delightful, soft cookies with a rich cocoa flavor and a vibrant red hue, coated in a sweet powdered sugar layer that melts perfectly on warm cookies. These festive treats combine the classic taste of red velvet with a fun snowball appearance, making them perfect for holiday celebrations or any cozy occasion.
- Prep Time: 15 minutes
- Cook Time: 12 minutes
- Total Time: 27 minutes
- Yield: 24 cookies 1x
- Category: Dessert
- Method: Baking
- Cuisine: American
Ingredients
Dry Ingredients
- 1 1/2 cups all-purpose flour
- 1/2 cup cocoa powder
- 1 teaspoon baking powder
- 1/4 teaspoon salt
Wet Ingredients
- 1/2 cup unsalted butter, softened
- 1 cup granulated sugar
- 1 large egg
- 1 teaspoon vanilla extract
- 1 tablespoon red food coloring
Coating
- 1 cup powdered sugar
Instructions
- Preparation: Preheat your oven to 350°F (175°C) and line a baking sheet with parchment paper to prevent sticking and facilitate even baking.
- Mix Dry Ingredients: In a medium bowl, whisk together the all-purpose flour, cocoa powder, baking powder, and salt until well combined to ensure even distribution of the leavening and cocoa.
- Cream Butter and Sugar: In a separate large bowl, beat the softened unsalted butter and granulated sugar together until the mixture is light, fluffy, and creamy, which will help with the texture of your cookies.
- Add Wet Ingredients: Incorporate the egg, vanilla extract, and red food coloring into the butter and sugar mixture. Mix thoroughly until the color is uniform and the ingredients are fully combined.
- Combine Ingredients: Gradually add the dry ingredient mixture to the wet ingredients, stirring continuously until a smooth, cohesive dough forms without overmixing.
- Form Snowballs: Scoop tablespoon-sized portions of the dough and roll them into smooth balls with your hands to create the characteristic round shape of snowball cookies.
- Bake: Place the dough balls on the prepared baking sheet, spacing them evenly. Bake in the preheated oven for 10-12 minutes, or until the edges are set but the centers remain soft.
- Coat in Powdered Sugar: Allow the cookies to cool slightly, but while they are still warm, roll each cookie generously in powdered sugar to create a snowy, sweet coating that defines this recipe.
Notes
- Ensure the butter is softened to room temperature for easier mixing and better texture.
- Red food coloring is key for achieving the classic red velvet color; gel food coloring can be used for more vibrant results with less liquid added.
- If you prefer a stronger cocoa flavor, you can increase the cocoa powder by an additional tablespoon without affecting texture significantly.
- Allow cookies to cool slightly before coating in powdered sugar to help the sugar stick better without melting away.
- Store cookies in an airtight container at room temperature for up to 5 days, or freeze for longer storage.
Keywords: Red Velvet Cookies, Snowball Cookies, Cocoa Cookies, Holiday Cookies, Festive Desserts, Powdered Sugar Cookies