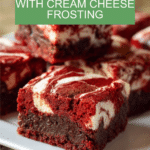
Red Velvet Brownies with Cream Cheese Frosting Recipe
Introduction
These Red Velvet Brownies with Cream Cheese Frosting offer a delightful twist on classic brownies. Combining the rich flavors of cocoa and red velvet with a creamy frosting, they make a perfect treat for any occasion.
Ingredients
- 1 ¼ cups (155g) all-purpose flour
- ¼ cup (25g) unsweetened cocoa powder
- 1 cup (200g) granulated sugar
- ½ cup (115g) unsalted butter, melted
- 2 large eggs
- 1 tsp vanilla extract
- 1 tbsp red food coloring (liquid or gel)
- ¼ tsp salt
- 4 oz (115g) cream cheese, softened
- 2 tbsp unsalted butter, softened
- 1 cup (120g) powdered sugar, sifted
- ½ tsp vanilla extract
Instructions
- Step 1: Preheat your oven to 350°F (175°C). Line an 8×8-inch baking pan with parchment paper, leaving a bit of overhang for easy removal of the brownies later.
- Step 2: In a medium bowl, whisk together the flour, cocoa powder, and salt until evenly combined. Set aside.
- Step 3: In a large bowl, stir the melted butter and granulated sugar until well incorporated. Add eggs one at a time, mixing thoroughly after each. Stir in vanilla extract and red food coloring until the mixture is uniformly red.
- Step 4: Gradually fold the dry ingredients into the wet ingredients with a spatula until just combined. Avoid overmixing to keep the brownies tender.
- Step 5: Pour the batter evenly into the prepared pan and smooth the top. Bake for 20–25 minutes or until a toothpick inserted in the center comes out with a few moist crumbs. Let cool completely in the pan.
- Step 6: While brownies cool, beat together softened cream cheese and butter until smooth. Gradually add powdered sugar, beating after each addition. Stir in vanilla extract to finish the frosting.
- Step 7: Once brownies are at room temperature, spread the cream cheese frosting evenly over the top. Use parchment overhang to lift brownies from the pan, slice, and serve.
Tips & Variations
- For a more intense red color, use gel food coloring instead of liquid.
- To add texture, sprinkle chopped pecans or walnuts into the batter before baking.
- Allow the brownies to cool fully before frosting to prevent the frosting from melting.
- For a dairy-free option, substitute cream cheese and butter with plant-based alternatives.
Storage
Store the frosted brownies in an airtight container in the refrigerator for up to 4 days. Bring them to room temperature or warm briefly before serving to enjoy a soft texture.
How to Serve
Serve this delicious recipe with your favorite sides.
FAQs
Can I make these brownies ahead of time?
Yes, you can bake the brownies a day in advance and store them unfrosted at room temperature. Frost just before serving for best texture.
What can I use if I don’t have red food coloring?
You can try natural alternatives like beet juice or powder, but the color may be less vibrant.
PrintRed Velvet Brownies with Cream Cheese Frosting Recipe
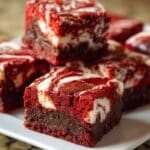
Enjoy these decadent Red Velvet Brownies topped with a smooth and creamy cream cheese frosting. This recipe combines the rich flavors of cocoa and red velvet with a moist brownie texture, perfect for dessert lovers craving a twist on classic brownies.
- Prep Time: 15 minutes
- Cook Time: 20-25 minutes
- Total Time: 40 minutes
- Yield: 16 brownies (4×4-inch squares) 1x
- Category: Desserts
- Method: Baking
- Cuisine: American
Ingredients
Brownies
- 1 ¼ cups (155g) all-purpose flour
- ¼ cup (25g) unsweetened cocoa powder
- 1 cup (200g) granulated sugar
- ½ cup (115g) unsalted butter, melted
- 2 large eggs
- 1 tsp vanilla extract
- 1 tbsp red food coloring (liquid or gel)
- ¼ tsp salt
Cream Cheese Frosting
- 4 oz (115g) cream cheese, softened
- 2 tbsp unsalted butter, softened
- 1 cup (120g) powdered sugar, sifted
- ½ tsp vanilla extract
Instructions
- Preheat and Prepare: Preheat your oven to 350°F (175°C). Line an 8×8-inch baking pan with parchment paper, leaving a bit of overhang for easy removal of the brownies later.
- Mix the Dry Ingredients: In a medium bowl, whisk together the all-purpose flour, unsweetened cocoa powder, and salt until evenly combined. Set aside this dry mix for later.
- Combine the Wet Ingredients: In a large mixing bowl, stir the melted unsalted butter and granulated sugar until well incorporated. Then add the eggs one at a time, mixing thoroughly after each addition. Stir in the vanilla extract and red food coloring until the mixture turns a uniform, vibrant red.
- Create the Batter: Gradually add the dry ingredients to the wet ingredients, folding them in gently with a spatula until just combined. Avoid overmixing to maintain a tender brownie texture.
- Bake the Brownies: Pour the batter evenly into the prepared baking pan and smooth the top with a spatula. Bake in the preheated oven for 20–25 minutes, or until a toothpick inserted in the center comes out with a few moist crumbs. Remove from oven and let the brownies cool completely in the pan.
- Make the Frosting: While the brownies cool, combine the softened cream cheese and unsalted butter in a mixing bowl and beat until smooth and creamy. Gradually add the sifted powdered sugar, beating well after each addition. Stir in the vanilla extract to finish the frosting.
- Frost and Serve: Once the brownies have cooled to room temperature, spread the cream cheese frosting evenly over the top. Use the parchment paper overhang to lift the brownies out of the pan, then slice into squares and serve.
Notes
- Do not overmix the batter to ensure a tender brownie texture.
- Allow brownies to cool completely before frosting to prevent melting.
- Use parchment paper with overhang for easy removal of brownies from the pan.
- Store leftover brownies in an airtight container in the refrigerator for up to 5 days.
- For a more intense red color, use gel food coloring instead of liquid.
Keywords: Red Velvet Brownies, Cream Cheese Frosting, Brownie Recipe, Dessert, Baking