M&M Cookie Bars Recipe
Introduction
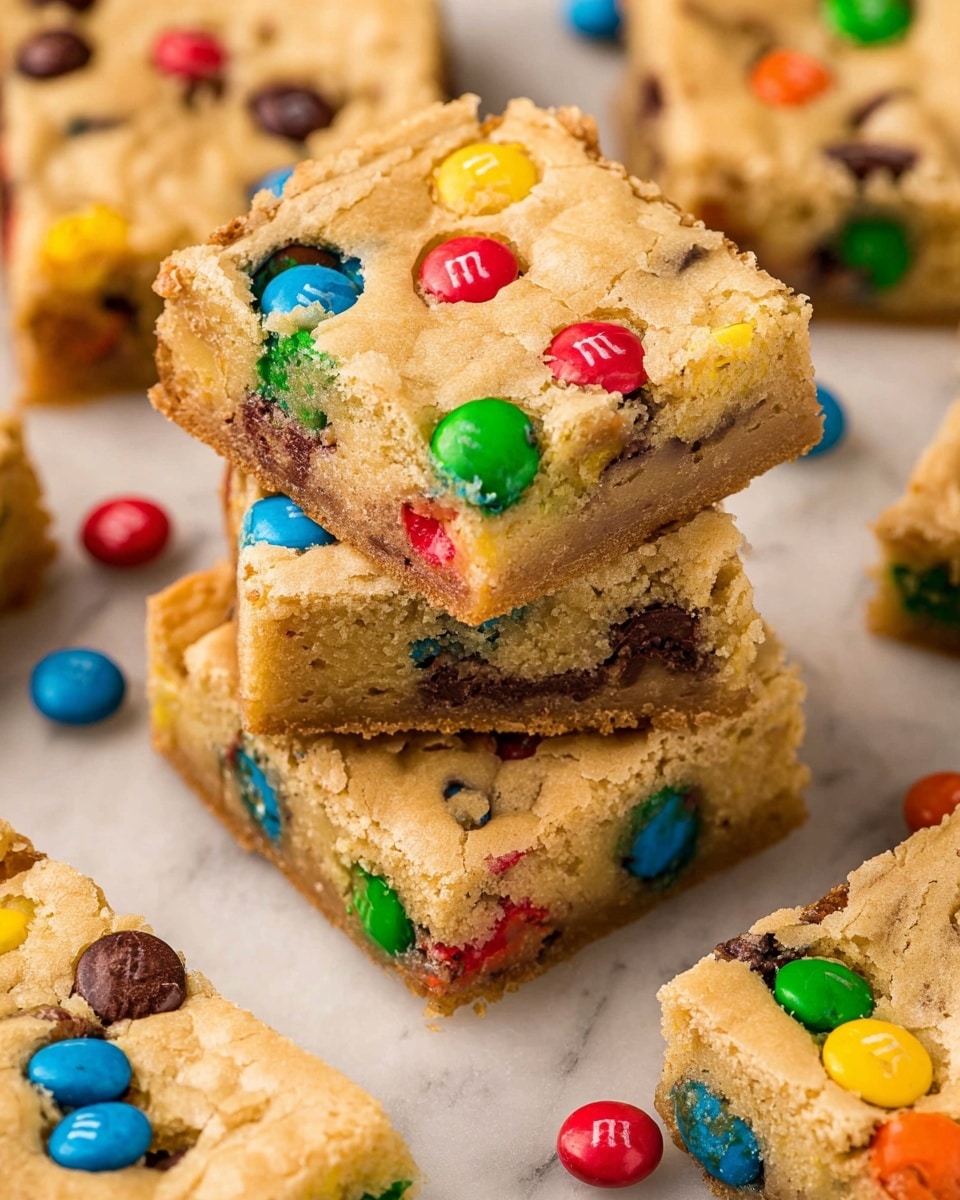
These M&M Cookie Bars are a delightful twist on classic cookies, combining chewy, buttery dough with colorful M&M candies and rich chocolate chips. Perfect for sharing or packing in lunchboxes, they offer a fun and easy treat for any occasion.
Ingredients
- 3 cups all-purpose flour
- 1 teaspoon baking soda
- 1 teaspoon salt
- 1 cup unsalted butter (room temperature)
- 1 cup light brown sugar (packed)
- ½ cup granulated sugar
- 2 large eggs
- 2 teaspoons vanilla extract
- 1 ⅓ cup M&M candies (divided)
- 1 cup semi-sweet chocolate chips
Instructions
- Step 1: Preheat the oven to 350℉. Line a 9×13-inch baking pan with parchment paper or foil and set aside.
- Step 2: In a large bowl, whisk together the flour, baking soda, and salt. Set this dry mixture aside.
- Step 3: In a stand mixer bowl, or a large bowl with a hand mixer, beat the butter, brown sugar, and granulated sugar until light and fluffy. Then add the eggs and vanilla extract, mixing until well combined.
- Step 4: With the mixer on low speed, gradually add the dry ingredients, mixing just until incorporated—avoid overmixing.
- Step 5: Fold in 1 cup of the M&M candies along with the chocolate chips gently by hand.
- Step 6: Press the cookie dough evenly into the prepared baking pan. Sprinkle the remaining M&M candies evenly over the top.
- Step 7: Bake for 22 to 30 minutes, until the top is golden, the edges are lightly browned, and the center is just set. Remove from the oven and place the pan on a cooling rack. Allow the bars to cool completely before slicing and serving.
Tips & Variations
- For extra chewiness, substitute half the all-purpose flour with bread flour.
- Use crunchy peanut butter M&Ms or seasonal color-themed candies to match any celebration.
- To make it gluten-free, try a 1-to-1 gluten-free flour blend instead of all-purpose flour.
Storage
Store the cooled M&M Cookie Bars in an airtight container at room temperature for up to 4 days. For longer storage, keep them refrigerated for up to a week or freeze for up to 3 months. Rewarm bars slightly in the microwave before serving for a soft, fresh-baked feel.
How to Serve
Serve this delicious recipe with your favorite sides.
FAQs
Can I use salted butter instead of unsalted butter?
Yes, you can use salted butter, but reduce or omit the added salt in the recipe to avoid an overly salty taste.
How can I make these bars more chocolatey?
Increase the amount of chocolate chips or add chunks of your favorite chocolate bar to the dough for a richer chocolate flavor.
PrintM&M Cookie Bars Recipe

Delightfully chewy and colorful M&M Cookie Bars that combine classic cookie flavors with crunchy candy-coated chocolates and rich chocolate chips. These bars are perfect for sharing at parties, enjoying as a sweet snack, or brightening up any dessert spread with their vibrant appearance and satisfying texture.
- Prep Time: 15 minutes
- Cook Time: 25 minutes
- Total Time: 40 minutes
- Yield: 24 bars 1x
- Category: Dessert
- Method: Baking
- Cuisine: American
Ingredients
Dry Ingredients
- 3 cups all-purpose flour
- 1 teaspoon baking soda
- 1 teaspoon salt
Wet Ingredients
- 1 cup unsalted butter (room temperature)
- 1 cup light brown sugar (packed)
- ½ cup granulated sugar
- 2 large eggs
- 2 teaspoons vanilla extract
Mix-ins
- 1 ⅓ cup M&M candies (divided)
- 1 cup semi-sweet chocolate chips
Instructions
- Preheat and Prepare Pan. Preheat your oven to 350℉ (175℃). Line a 9×13 inch baking pan with parchment paper or foil, allowing some overhang for easy removal later, and set aside.
- Combine Dry Ingredients. In a large mixing bowl, whisk together the all-purpose flour, baking soda, and salt until well blended. Set aside.
- Cream Butter and Sugars. Using a stand mixer or hand mixer in a large bowl, beat the softened unsalted butter, light brown sugar, and granulated sugar together on medium speed until the mixture becomes light and fluffy, approximately 2-3 minutes.
- Add Eggs and Vanilla. Add the eggs one at a time to the creamed butter and sugar mixture, beating well after each addition. Mix in the vanilla extract until fully incorporated.
- Incorporate Dry Ingredients. With the mixer on low speed, gradually add the dry flour mixture into the wet ingredients a little at a time, mixing just until combined to avoid overworking the dough.
- Fold in Mix-ins. Gently fold 1 cup of M&M candies and all the semi-sweet chocolate chips into the cookie dough until evenly distributed.
- Press Dough into Pan. Transfer the cookie dough into the prepared baking pan and press it down evenly with your hands or a spatula to form a uniform layer.
- Add Topping M&Ms. Sprinkle the remaining ⅓ cup of M&M candies evenly across the top of the dough, gently pressing them into the surface.
- Bake. Place the pan in the preheated oven and bake for 22 to 30 minutes, or until the top is golden brown, edges are lightly toasted, and the center is just barely set but not raw. The bars will firm up further as they cool.
- Cool and Serve. Remove the pan from the oven and place it on a cooling rack. Allow the cookie bars to cool completely in the pan before lifting them out using the parchment overhang and slicing into squares for serving.
Notes
- Room temperature butter is key for achieving the right dough consistency and texture in the bars.
- Do not overmix the dough once you add the flour to avoid tough cookie bars.
- For clean bars, ensure they are fully cooled before slicing.
- Substitute gluten-free all-purpose flour blend if you need gluten-free bars, but note texture differences.
- Store the cookie bars in an airtight container at room temperature for up to 5 days or freeze for longer storage.
Keywords: M&M Cookie Bars, cookie bars, chocolate chip bars, easy dessert, colorful cookies, party snacks