Red Velvet Brownies with Cream Cheese Swirl Recipe
Introduction
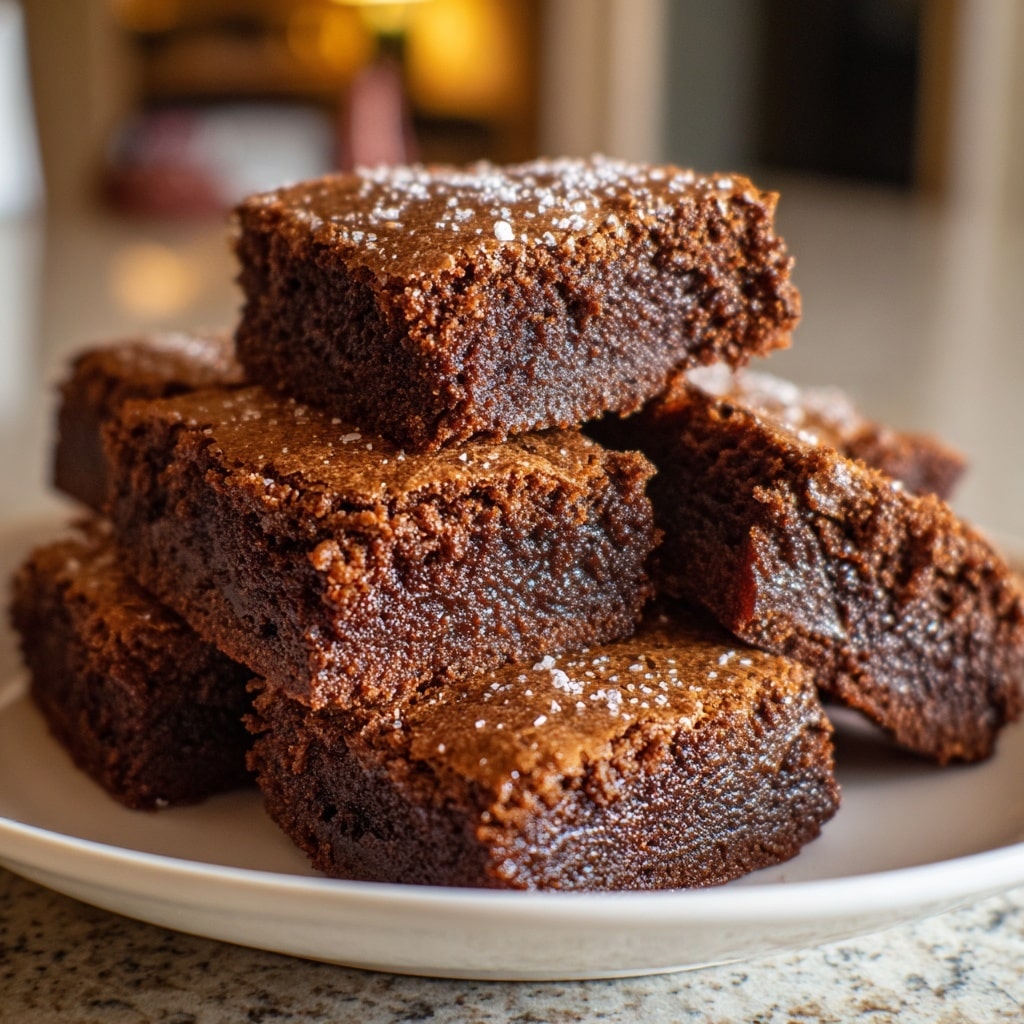
These red velvet brownies combine the rich, fudgy texture of traditional brownies with the tangy cream cheese swirl you love in red velvet cakes. They’re a delicious and visually striking treat perfect for any occasion.
Ingredients
- 1 cup (225 g) unsalted butter, melted
- 1½ cups (300 g) granulated sugar
- 2 large eggs
- 1 tsp vanilla extract
- 1 tbsp cocoa powder
- 1½ cups (190 g) all-purpose flour
- ½ tsp baking powder
- ¼ tsp salt
- 2–3 tbsp red food coloring
- 8 oz (225 g) cream cheese, softened
- ¼ cup (50 g) granulated sugar
- 1 tsp vanilla extract
- 1 egg
Instructions
- Step 1: Preheat your oven to 350°F (175°C). Grease or line an 8×8-inch baking pan with parchment paper for easy removal.
- Step 2: In a large bowl, whisk together the melted butter and 1½ cups sugar until smooth. Add the eggs, 1 teaspoon vanilla extract, cocoa powder, and red food coloring. Mix well to combine.
- Step 3: Stir in the flour, baking powder, and salt until the batter is just combined—avoid overmixing.
- Step 4: In a separate bowl, beat the softened cream cheese with ¼ cup sugar, 1 teaspoon vanilla extract, and the egg until smooth and creamy.
- Step 5: Pour half of the brownie batter into the prepared pan. Drop spoonfuls of half the cream cheese mixture over the batter, then gently swirl with a knife to create a marbled effect.
- Step 6: Repeat with the remaining brownie batter and cream cheese mixture, swirling again for a beautiful pattern.
- Step 7: Bake for 25–30 minutes, or until a toothpick inserted into the center comes out with a few moist crumbs.
- Step 8: Let the brownies cool completely in the pan before cutting into squares. Optionally, dust with powdered sugar or drizzle with melted chocolate for extra flair.
Tips & Variations
- Use gel or paste red food coloring for the most vibrant color without thinning the batter.
- For a nuttier twist, add ½ cup chopped walnuts or pecans to the brownie batter.
- If you prefer a more pronounced cream cheese flavor, increase the cream cheese filling by 50%.
- Make mini brownies by using a muffin tin, reducing baking time to about 18–20 minutes.
Storage
Store leftover brownies in an airtight container at room temperature for up to 3 days or refrigerate for up to a week. To reheat, warm individual squares in the microwave for 10–15 seconds. These brownies also freeze well—wrap tightly and freeze for up to 3 months. Thaw overnight in the fridge before serving.
How to Serve
Serve this delicious recipe with your favorite sides.
FAQs
Can I use regular cocoa powder instead of Dutch-processed?
Yes, regular cocoa powder works fine here. The small amount used adds subtle chocolate flavor without affecting the texture much.
What if I don’t have an 8×8-inch pan?
You can use a 9×9-inch pan, but keep an eye on the baking time as it may be slightly shorter. The brownies will be a bit thinner with a larger pan.
PrintRed Velvet Brownies with Cream Cheese Swirl Recipe
Delight in these rich and moist Red Velvet Brownies, featuring a vibrant cocoa-infused brownie base swirled with a creamy tangy cream cheese layer. Perfectly balanced in flavor and visually stunning, these brownies are sure to impress at any gathering or as a decadent treat.
- Prep Time: 15 minutes
- Cook Time: 25-30 minutes
- Total Time: 40-45 minutes
- Yield: 16 brownies (approximate) 1x
- Category: Dessert
- Method: Baking
- Cuisine: American
Ingredients
Brownie Layer
- 1 cup (225 g) unsalted butter, melted
- 1½ cups (300 g) granulated sugar
- 2 large eggs
- 1 tsp vanilla extract
- 1 tbsp cocoa powder
- 1½ cups (190 g) all-purpose flour
- ½ tsp baking powder
- ¼ tsp salt
- 2–3 tbsp red food coloring
Cream Cheese Swirl
- 8 oz (225 g) cream cheese, softened
- ¼ cup (50 g) granulated sugar
- 1 tsp vanilla extract
- 1 egg
Instructions
- Preheat oven: Preheat your oven to 350°F (175°C). Prepare an 8×8-inch baking pan by greasing it well or lining it with parchment paper to prevent sticking.
- Make brownie batter: In a large mixing bowl, whisk the melted butter and granulated sugar together until the mixture is smooth. Add the eggs, vanilla extract, cocoa powder, and red food coloring, then mix until fully combined. Gradually stir in the all-purpose flour, baking powder, and salt until just incorporated without overmixing.
- Prepare cream cheese layer: In a separate bowl, beat the softened cream cheese with sugar, vanilla extract, and egg until the mixture is smooth and creamy without lumps.
- Assemble: Pour half of the red velvet brownie batter evenly into the prepared baking pan. Drop spoonfuls of half the cream cheese mixture over the batter and gently swirl them together with a knife to create a marbled effect. Repeat the process with the remaining brownie batter and cream cheese mixture, layering and swirling as before.
- Bake: Place the pan in the preheated oven and bake for 25 to 30 minutes. The brownies are done when a toothpick inserted into the center comes out with a few moist crumbs but no wet batter.
- Cool & serve: Allow the brownies to cool completely in the pan before cutting them into squares. For an extra touch, optionally dust with powdered sugar or drizzle with melted chocolate before serving.
Notes
- Use room temperature eggs and cream cheese for easier mixing and better texture.
- Adjust the amount of red food coloring according to your color preference, but avoid adding too much to prevent a bitter taste.
- Make sure not to overmix the batter to keep the brownies tender.
- Cooling completely before cutting helps clean edges and prevents crumbling.
- Store leftovers in an airtight container in the refrigerator for up to 4 days.
Keywords: Red Velvet Brownies, Cream Cheese Brownies, Valentine’s Day Dessert, Cocoa Brownies, Swirled Brownies, Moist Brownies