Oreo Dump Cake Recipe
Introduction
This Oreo Dump Cake is a deliciously simple dessert that combines the rich flavors of Oreos, chocolate, and creamy layers. It’s perfect for when you want a show-stopping treat with minimal effort and maximum yum.
Ingredients
- 20 Oreo cookies
- 14 ounces sweetened condensed milk (1 14-ounce can)
- 1 container (8 ounces) Cool Whip, thawed for about 15 minutes
- 1 box chocolate cake mix
- ¾ cup butter (1 ½ sticks or 12 tablespoons), cut into 12 pats or smaller
Instructions
- Step 1: Preheat your oven to 350°F (175°C) and lightly grease a 9×13-inch baking dish with butter or non-stick spray.
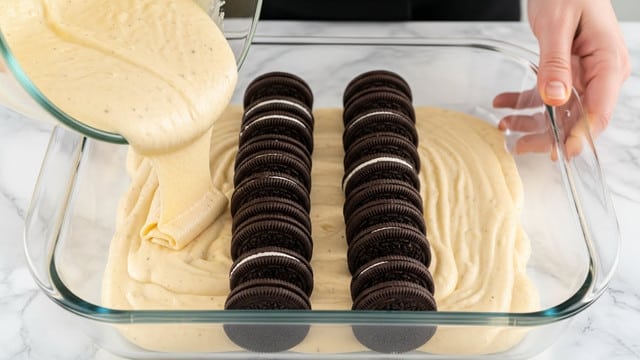
- Step 2: Arrange 20 Oreo cookies in two layers of 10 across the bottom of the prepared dish.
- Step 3: Pour the sweetened condensed milk evenly over the Oreo cookies.
- Step 4: Spread the thawed Cool Whip evenly over the condensed milk layer using a spatula.
- Step 5: Sprinkle the entire box of chocolate cake mix evenly on top of the Cool Whip. Use a fork to break up any lumps for an even layer.
- Step 6: Distribute the butter pats across the surface of the cake mix to cover as much area as possible. Do not stir or mix it in.
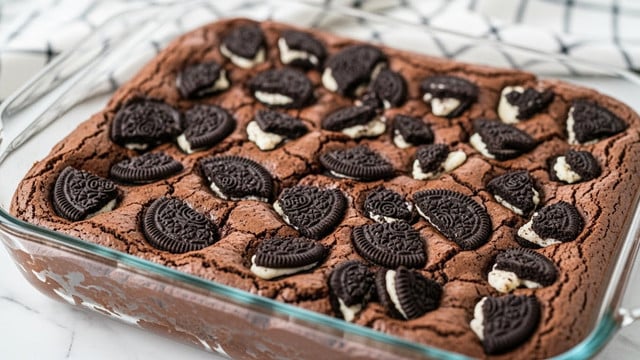
- Step 7: Bake in the preheated oven for 40-45 minutes, until the top is golden and bubbly.
- Step 8: Remove from the oven and allow to cool slightly before serving.
Tips & Variations
- Use regular or double-stuff Oreos depending on your preference for cream filling.
- Add a handful of chopped nuts or chocolate chips on top before baking for added texture.
- If you prefer, substitute Cool Whip with whipped cream or cream cheese frosting for a richer layer.
- For a fun twist, try using a different cake mix flavor like red velvet or vanilla.
Storage
Store leftover cake covered tightly in the refrigerator for up to 4 days. To serve, bring to room temperature or warm slightly in the microwave for about 20 seconds for a soft, gooey texture.
How to Serve
Serve this delicious recipe with your favorite sides.
FAQs
Can I use homemade whipped cream instead of Cool Whip?
Yes, homemade whipped cream can be used as a substitute, but it may not hold up as firmly during baking, so the texture might vary slightly.
Do I need to crush the Oreos before layering?
No, the Oreos are layered whole at the bottom to provide a nice texture contrast after baking.
PrintOreo Dump Cake Recipe

This Oreo Dump Cake is a simple, indulgent dessert that layers whole Oreo cookies with sweetened condensed milk, Cool Whip, chocolate cake mix, and butter, then bakes into a rich, gooey treat perfect for any occasion. Its easy-to-make assembly ensures a crowd-pleaser without any complicated steps.
- Prep Time: 10 minutes
- Cook Time: 40-45 minutes
- Total Time: 50-55 minutes
- Yield: 12 servings 1x
- Category: Dessert
- Method: Baking
- Cuisine: American
Ingredients
Cookies
- 20 Oreo cookies
Dairy & Toppings
- 14 ounces of sweetened condensed milk (1 14-ounce can)
- 1 8 ounce container of Cool Whip, thawed for about 15 minutes before starting
Baking
- 1 box of chocolate cake mix (standard size, about 15.25 ounces)
- ¾ cup of butter (1 ½ sticks or 12 tablespoons), cut into 12 pats or smaller pieces
Instructions
- Preheat the oven: Preheat your oven to 350°F (175°C) and lightly grease a 9×13-inch baking dish with butter or non-stick cooking spray to prevent sticking.
- Layer the Oreos: Arrange two layers of 10 Oreo cookies each evenly across the bottom of the prepared baking dish, creating a solid base.
- Add the sweetened condensed milk: Pour the entire 14-ounce can of sweetened condensed milk evenly over the Oreo layers to soak and add rich sweetness.
- Spread Cool Whip: Using a spatula, spread the thawed 8 ounces of Cool Whip evenly over the sweetened condensed milk layer for a creamy topping.
- Sprinkle cake mix: Evenly sprinkle the entire box of chocolate cake mix over the Cool Whip layer. Use a fork to break up any lumps and create an even surface.
- Add butter: Cut the ¾ cup of butter into 1-tablespoon slices or smaller pieces and distribute them evenly over the top of the cake mix. Do not stir or mix in the butter; it will melt and create a crisp topping while baking.
- Bake the cake: Place the assembled dish in the oven and bake at 350°F (175°C) for 40 to 45 minutes, or until the top is golden and bubbly around the edges.
- Cool and serve: Remove the cake from the oven and allow it to cool slightly before serving to let the layers set and make serving easier.
Notes
- Make sure the Cool Whip is thawed but still cold before spreading to maintain the desired texture.
- Do not stir after adding the butter on top; it melts during baking to create the signature crispy crust.
- Use a 9×13-inch baking dish for best results and proper cooking times.
- Allow the cake to cool slightly before serving to prevent the layers from falling apart.
- For an extra indulgence, serve with a scoop of vanilla ice cream or drizzle with chocolate syrup.
Keywords: Oreo dump cake, easy dessert, chocolate dessert, Oreo recipe, no mixer cake, quick cake recipe