Snowball Cake Recipe with Raspberry and Coconut Recipe
Introduction
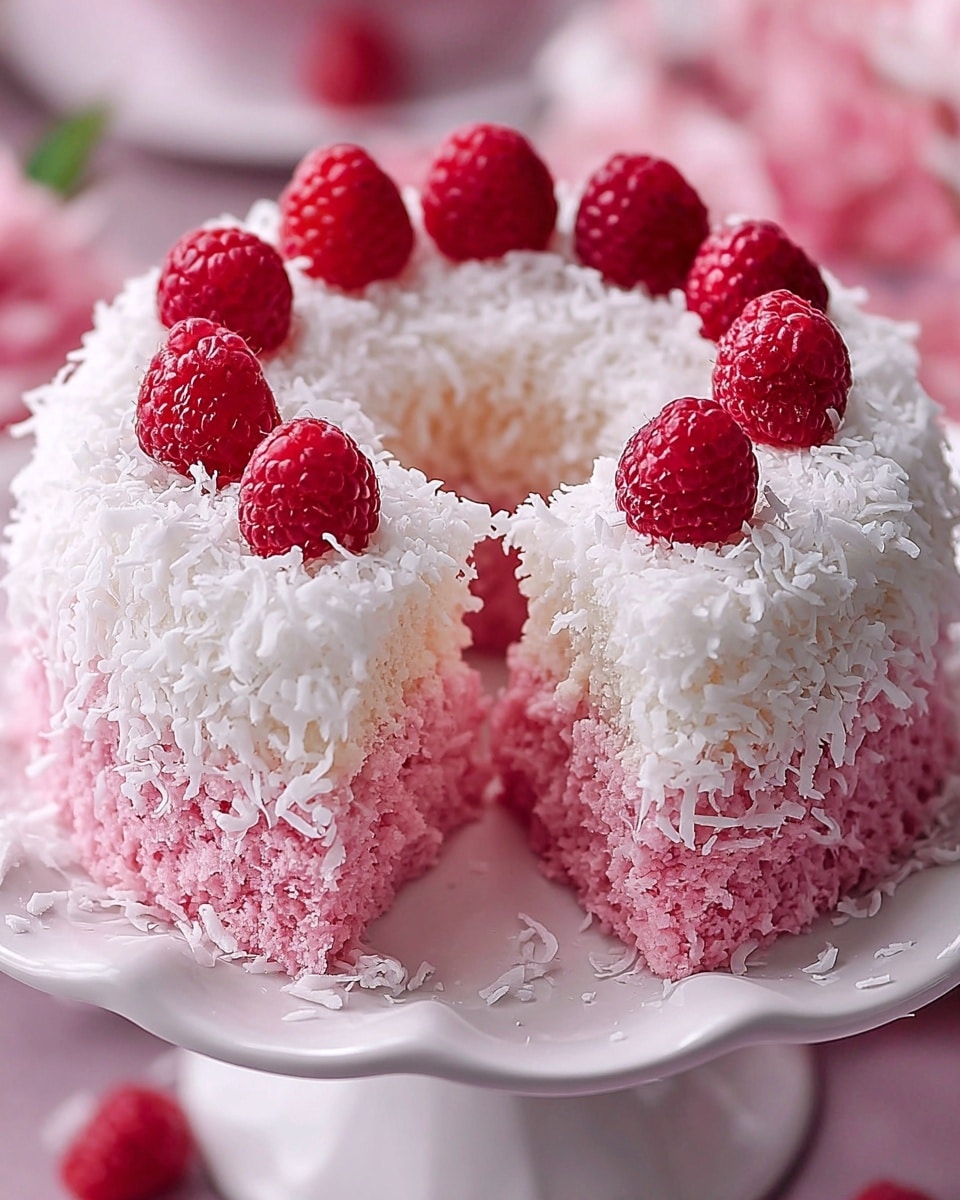
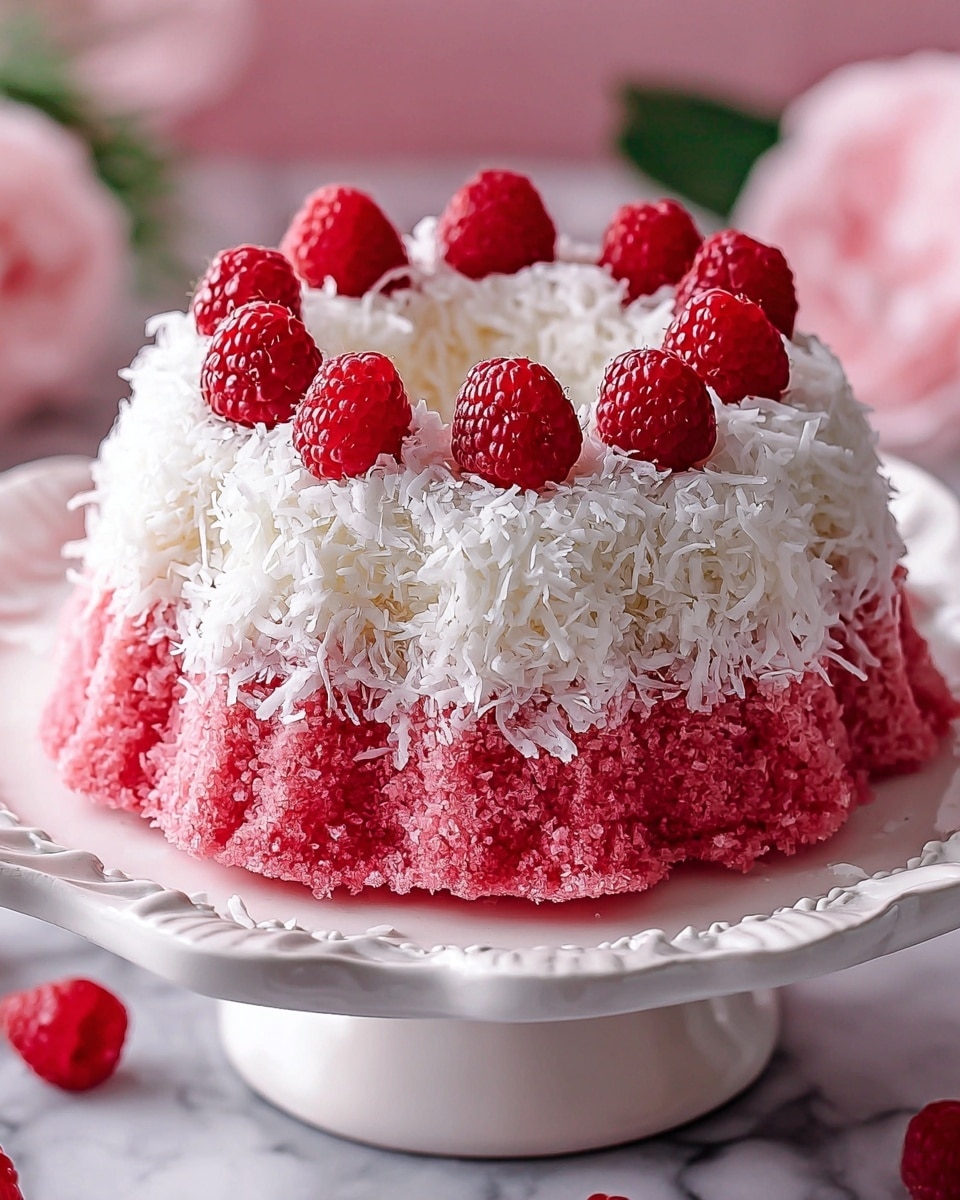
Snowball Cake is a delightful raspberry coconut dessert that combines tender cake with a sweet swirl of preserves and a coating of shredded coconut. Its unique dome shape and moist texture make it a perfect treat for any gathering or special occasion.
Ingredients
- 2½ cups all-purpose flour
- 1½ teaspoons baking powder
- ½ teaspoon salt
- ¾ cup unsalted butter, room temperature
- 1½ cups granulated sugar
- 3 large eggs
- 1 tablespoon vanilla extract
- 1 cup whole milk
- ½ cup raspberry preserves (slightly warmed)
- 2 cups sweetened shredded coconut
- Powdered sugar (optional, for dusting)
Instructions
- Step 1: Preheat your oven to 350°F (175°C) and grease a 10-cup oven-safe dome pan or bowl. Dust it lightly with flour to prevent sticking.
- Step 2: In a medium bowl, whisk together the flour, baking powder, and salt. In a separate large bowl, cream the butter and sugar together until light and fluffy. Beat in the eggs one at a time, then add the vanilla extract.
- Step 3: Alternate adding the dry flour mixture and the milk to the butter mixture, mixing gently after each addition until just combined. Avoid overmixing to keep the cake tender.
- Step 4: Pour half of the batter into the prepared pan. Spoon the warmed raspberry preserves evenly over the batter. Carefully cover with the remaining batter, then gently swirl the preserves into the batter with a knife or skewer for a marbled effect.
- Step 5: Bake for 45–55 minutes or until a toothpick inserted in the center comes out clean. Let the cake cool in the pan for 10 minutes before inverting onto a wire rack to cool completely.
- Step 6: Once cooled, brush the cake lightly with water or syrup if needed, then press sweetened shredded coconut all over the outside to coat the surface. Dust with powdered sugar if desired. Slice and enjoy your homemade Snowball Cake!
Tips & Variations
- For a more intense raspberry flavor, swirl in a little fresh mashed raspberries along with the preserves.
- If you prefer, replace the raspberry preserves with strawberry or blueberry preserves for a different fruit twist.
- Use toasted coconut instead of sweetened for a deeper, nutty flavor and crunch.
- Make sure the raspberry preserves are slightly warmed to help create smooth swirls in the batter.
- Greasing and dusting the pan well is key to easily releasing the dome-shaped cake after baking.
Storage
Store the Snowball Cake in an airtight container at room temperature for up to 2 days. For longer storage, refrigerate for up to 5 days, allowing it to come to room temperature before serving. You can also freeze the cake wrapped tightly in plastic wrap and foil for up to 3 months; thaw overnight in the refrigerator before serving. Reheat slices gently in a microwave or oven if desired.
How to Serve
Serve this delicious recipe with your favorite sides.
FAQs
Can I use a different type of flour?
All-purpose flour works best for this cake to achieve the right texture, but you can experiment with cake flour for a lighter crumb. Avoid whole wheat flour as it may make the cake dense.
What if I don’t have a dome pan?
You can use a similarly sized oven-safe bowl or a bundt pan. Just adjust the baking time if needed and make sure it’s well greased and floured to prevent sticking.
PrintSnowball Cake Recipe with Raspberry and Coconut Recipe

This Snowball Cake is a delightful raspberry coconut dessert perfect for any occasion. Featuring a tender vanilla cake swirled with raspberry preserves and generously coated with sweetened shredded coconut, this recipe combines vibrant flavors and a delightful texture that is both moist and fluffy. The cake is finished with a dusting of powdered sugar, making it visually appealing and irresistibly tasty.
- Prep Time: 20 minutes
- Cook Time: 50 minutes
- Total Time: 1 hour 10 minutes
- Yield: 12 servings 1x
- Category: Baking
- Method: Baking
- Cuisine: American
Ingredients
Cake Batter
- 2½ cups all-purpose flour
- 1½ teaspoons baking powder
- ½ teaspoon salt
- ¾ cup unsalted butter, room temperature
- 1½ cups granulated sugar
- 3 large eggs
- 1 tablespoon vanilla extract
- 1 cup whole milk
Filling and Topping
- ½ cup raspberry preserves (slightly warmed)
- 2 cups sweetened shredded coconut
- Powdered sugar (optional, for dusting)
Instructions
- Preheat and Prepare Pan: Preheat your oven to 350°F (175°C). Grease a 10-cup oven-safe dome pan or bowl thoroughly and dust it with flour to prevent sticking.
- Mix Dry Ingredients: In a medium bowl, whisk together the all-purpose flour, baking powder, and salt, ensuring even distribution of the leavening agents and seasoning.
- Cream Butter and Sugar: In a separate large bowl, use a mixer to cream the room temperature unsalted butter and granulated sugar until the mixture is light and fluffy, about 3-5 minutes. This will incorporate air, contributing to the cake’s tender crumb.
- Add Eggs and Vanilla: Beat the eggs in one at a time into the creamed butter and sugar, blending well after each addition. Then, mix in the vanilla extract for flavor.
- Combine Ingredients: Alternate adding the dry flour mixture and whole milk to the butter mixture, starting and ending with the dry ingredients. Mix each addition just until combined to avoid overmixing and developing gluten.
- Assemble the Cake: Pour half of the batter into the prepared pan. Spoon the slightly warmed raspberry preserves evenly over the batter. Pour the remaining batter over the preserves and gently swirl the layers together with a knife or skewer to create a marbled effect.
- Bake: Place the pan in the preheated oven and bake for 45 to 55 minutes, or until a toothpick inserted into the center comes out clean.
- Cool: Let the cake cool in the pan for 10 minutes before carefully turning it out onto a wire rack. Allow it to cool completely.
- Coat with Coconut: Lightly brush the cooled cake with water or syrup to help the coconut adhere. Press the sweetened shredded coconut all over the exterior of the cake to coat it evenly.
- Finish and Serve: If desired, dust the cake lightly with powdered sugar. Slice and enjoy this luscious Snowball Cake with its generous raspberry swirl and coconut coating.
Notes
- Ensure butter is at room temperature for easier creaming and better texture.
- Warm raspberry preserves slightly to make spreading easier and to swirl better through the batter.
- Swirling the preserves gently prevents mixing too much, preserving the pretty marbled effect.
- Use sweetened shredded coconut for a more pronounced flavor and texture contrast.
- If you prefer, substitute whole milk with buttermilk for a tangier flavor and softer crumb.
- Store leftovers in an airtight container at room temperature for up to 3 days.
- This cake can also be baked in a bundt pan or a standard 9-inch round cake pan if a dome pan is not available.
Keywords: Snowball Cake, Raspberry Coconut Cake, Raspberry Swirl Cake, Coconut Cake, Dessert Cake, Easy Baking Recipe, Fruity Cake, Festive Cake